-
Gone - 1988 Shiro
2004 BMW 330Ci
2005 BMW 330i
1991 Twin Turbo Z's (Red and Black)
http://www.E46Turbo330Ci.com -
i take out the little clip, then take out the lower control arm
then i take it and wack it against the concrete…done. lolMy Build Thread -
supporting the arm with a jack/jackstand and whacking it with a hammer works too if it's not too frozen in there.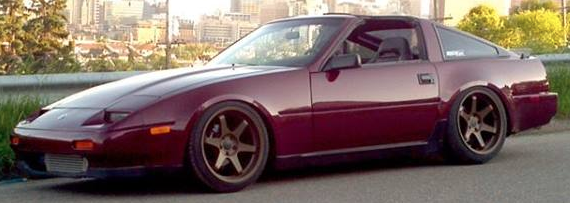

1988 300zxt. gt35, stance, etc. Wheels: Varrstoen ES2 18x9.5 et-13 225/40. 18x10.5 et0 245/40
1990 jetta vr6'd -
This is without taking it out and causing harm to the ball joint opening on the transverse link. I have read where guys have stretched the hole and then get slop, clunking from the ball joint after the repair.862sik wrote: i take out the little clip, then take out the lower control arm
then i take it and wack it against the concrete…done. lolGone - 1988 Shiro
2004 BMW 330Ci
2005 BMW 330i
1991 Twin Turbo Z's (Red and Black)
http://www.E46Turbo330Ci.com -
You run a risk doing so if it is jammed in there with age. I have seen where some guys have tried creative ways to remove the ball joints and some have bent their control arms. 1-2mm bend in the metal will cause headaches when trying to align it.DeleriousZ wrote: supporting the arm with a jack/jackstand and whacking it with a hammer works too if it's not too frozen in there.
Yes, that works but at a risk. Not many guys have spare Transverse links at home.Gone - 1988 Shiro
2004 BMW 330Ci
2005 BMW 330i
1991 Twin Turbo Z's (Red and Black)
http://www.E46Turbo330Ci.com -
Doing it this way took 32 minutes one side and 36 minutes the other side.Gone - 1988 Shiro
2004 BMW 330Ci
2005 BMW 330i
1991 Twin Turbo Z's (Red and Black)
http://www.E46Turbo330Ci.com -
Duly noted for this weekend.
-
i spose that's less time than the 2 hours i spent with a hammer on one of mine that was off the car… lol.
1988 300zxt. gt35, stance, etc. Wheels: Varrstoen ES2 18x9.5 et-13 225/40. 18x10.5 et0 245/40
1990 jetta vr6'd -
oh soak it with pb blaster on the top and bottom to loosen up any rust. but MAKE SURE that snap ring comes out!My Build Thread -
Here is a tip, if you feel comfortable with your mechanic skill you can omit the part of removing the tie rod stud from the knuckle arm and this will speed up the process by quite a bit. It's included up there for educational purposes.Gone - 1988 Shiro
2004 BMW 330Ci
2005 BMW 330i
1991 Twin Turbo Z's (Red and Black)
http://www.E46Turbo330Ci.com -
you can also take the castle nut out off and re-position it upside down so that your clamp has a larger surface area to compress against. -
usually if i havent already, ill change the tie rods too. usually i hit the tie rods with a hammer on the side of the assymbly that connects to the balljoint, usually that helps loosen up the balljoint portion too.NIVO wrote: Here is a tip, if you feel comfortable with your mechanic skill you can omit the part of removing the tie rod stud from the knuckle arm and this will speed up the process by quite a bit. It's included up there for educational purposes.My Build Thread -
[quote]862sik wrote:Yeah this would be a good time to replace other steering components like tie rod ends, bushings etc..Originally posted by NIVOGone - 1988 Shiro
2004 BMW 330Ci
2005 BMW 330i
1991 Twin Turbo Z's (Red and Black)
http://www.E46Turbo330Ci.com -
The biggest issue I had was trying to get the balljoint to go in straight. No matter how slow I went, no matter how careful I tried to be, it always ended up slightly over to the side. I should note that I used the same tools as described in the how-to. I was able to reposition the press and get them in there… however it managed to bend the threaded portion for the grease fitting, which thankfully a slightly smaller one worked… so yeah, good write-up! They are just a pain either way =p1986 300ZX Turbo - Sold
1991 Toyota MR2 - RIP
2007 BMW 335i - Daily driver -
Serious? Took me maybe 10 minutes to remove them and put them in. And they were FROZEN. Just rented a ball joint removal/instal tool. CAKE

Copyright © 2006–. All rights reserved. Privacy Policy