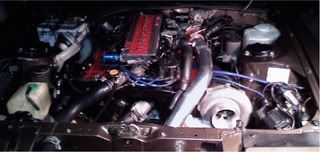
OWO Head Porting & Polishing
-
 BLOZ UPSenior Member
- 2971
Right now? Flow bench race to be honest. Thanks for taking the time to do this. Can you get some numbers at 10" of water? I've been reading that getting two (or more) pressures simulates a running engine better than just the standard 28". I realize this involves doing everything twice over.BLOZ UP.com
It is not recommended to confirm proper installation by driving into walls or other barriers as this could cause personal injury or damage to the vehicle. -
 300zxturboftwSenior Member
- 3709
Kind of off topic, but are there any good books/reading material on this topic?Usual Z31 suspect: Garage Queen (aka broken)

-
 BLOZ UPSenior Member
- 2971
I'm going off David Vizard's How to Port & Flow Test Cylinder Heads
I also received some 1/8" shank carbide bits, a set of 10 for $30 from eBay. They actually look really decent. And with 10 of them, if they turn out to suck it should still get me through one set of heads.BLOZ UP.com
It is not recommended to confirm proper installation by driving into walls or other barriers as this could cause personal injury or damage to the vehicle. -
 WTMPMember
- 31
I agree with making heads that make power vs just flow a lot of air, which is why I work on csa, air speed and efficiency, then cfm.Originally posted by youngfgThat speed was in the middle of the port. I don't know the csa measurement, I will try remember to get that next trip.
On another subject, my head porting expert/mentor says, "I can make a head that will win a flow bench race, or a head that will win a real race, which do you want?" -
 BLOZ UPSenior Member
- 2971
So I sent my cams in weeks ago, and called Schneider up just the other day. Apparently the shipping label and separate cam info sheet were torn off the poster tube I used. I thought it was clever, clearing something went wrong. Anyway, they got the cams and now knew who they belonged to. Got the 274-70H-14 grind coming back soon, so I'm going to attempt to finish the heads real quick.
Also started working on a couple more ports. The plan now is to remove the cast marks from the sides, blend the seats, grind out a little more of the bowl on the far side radius, polish the exhaust and chamber well, and smooth out the intake.BLOZ UP.com
It is not recommended to confirm proper installation by driving into walls or other barriers as this could cause personal injury or damage to the vehicle. -
 BLOZ UPSenior Member
- 2971
Here's what I've done. I didn't apparently take pics of the finished product but these are close:
The first one took a day, the second only a few hours. I could have done better on the long side radius after the valves, but the bits I had just wouldn't work with the angles I could get at. Most of the work centered around the valve opening where the cast finish of the port met the machining of the valve seat. Most of that work was smoothing out the short side radius. Otherwise I just removed casting marks from the sides of each port, and cleaned up the entire port. There was, however, a kind of "lip" on the exhaust side of the chamber on one of my heads--it appeared to be a casting/machining flaw. It was pronounced on one head, and only just noticeable on the other. I removed both. I did not radius the lip to the quench area. I've read conflicting info for/against it but decided to play it safe and skip it for now.
After the carbide burrs, I used 80 grit on the entire head. Then for the compression chamber and exhaust I went to 120 grit (the finest my kit came with), then polishing rubs. I ended up destroying most of the polishing pieces and had to jerry-rig the rest to finish. It's hard to tell in the pics but the exhaust and chamber really polished up nicely. There's a few pits here and there but I think it's fine for my first P&P job. Also, the chamber on cylinder #6 (I think) polished up extremely shiney--I couldn't get the others quite like it. I must have been using a worn 120 grit roll on it or something. Whatever, can't tell by touching it.
I read that most of the gains are going to be around the valve opening, so that's what I focused on. It also seemed to be where most of the improvements could be made due to machining marks. So this work plus a 3 angle valve job should match up well with my cam and give me all my horsepowers.
*
*
*
*
*
Now off to get a 3 angle valve job.BLOZ UP.com
It is not recommended to confirm proper installation by driving into walls or other barriers as this could cause personal injury or damage to the vehicle. -
 88sinZSenior Member
- 2019
lol +0.500 lift
I'm just reading along wondering how often you guys plan to burn seats, feather valves, and rebuild your drive train - a street engine is not a race engine. Stick to a solid 2 angle with the VG.
Glad to see you coming onto the OWO world BLOZ. A simple job can improve characteristics
of the OWO 2 fold.
intake charge density > intake charge velocity -
 G-EJunior Member
- 6320
-
 GregmaticSenior Member
- 2193
3 not good on VG heads? A 5 angle I could understand, but I thought a 3 angle was fairly standard....
-
 300zxturboftwSenior Member
- 3709
This was my assumption. I've always done 3 anglesOriginally posted by Gregmatic3 not good on VG heads? A 5 angle I could understand, but I thought a 3 angle was fairly standard....Usual Z31 suspect: Garage Queen (aka broken)

-
 youngfgMember
- 44
In the testing I have done, the valve job is the most influential thing in getting good low lift flow, and I mean flow under .4"
Over .4" the port shape determines flow, but you can't get a cam with enough lift to make the flow at high lifts matter. -
 BLOZ UPSenior Member
- 2971
Yeah I will. The gaskets I have are pretty shitty. For the VG30 I've seen and used some nice metal ones with rubber port openings. I'd like to find those and work from that. Also, I need to clean up the lower intake to see how much matching I need to do. But, I can do this after the valve job and it won't take long.Originally posted by G-ENeeds more gasket matching!
Woah, everything I've read says 3-angle gets you the most bang for your buck. 4 and 5 angle give diminishing returns.Originally posted by 88sinZlol +0.500 lift
I'm just reading along wondering how often you guys plan to burn seats, feather valves, and rebuild your drive train - a street engine is not a race engine. Stick to a solid 2 angle with the VG.
Glad to see you coming onto the OWO world BLOZ. A simple job can improve characteristics
of the OWO 2 fold.
intake charge density > intake charge velocity
Me too. Didn't think it burned up seats.Originally posted by Gregmatic3 not good on VG heads? A 5 angle I could understand, but I thought a 3 angle was fairly standard....BLOZ UP.com
It is not recommended to confirm proper installation by driving into walls or other barriers as this could cause personal injury or damage to the vehicle. -
 88sinZSenior Member
- 2019
Originally posted by Gregmatic3 not good on VG heads? A 5 angle I could understand, but I thought a 3 angle was fairly standard....
Originally posted by 300zxturboftwThis was my assumption. I've always done 3 angles
While multi-angle is beneficial, the VG seats are ferro-iron. with that comes great maintainability and wide arrange of options in the head shop.
If you plan to turn 6K on the reg with a street/long term set up stick with a 2 angle, like the OEM set up of 15/45.
focus on more than seat parameters, push more air and fuel.. quit nit picking -
 88sinZSenior Member
- 2019
-
 300zxturboftwSenior Member
- 3709
=DUOTE=88sinZ;357261]sUre there's benefits, but how often are you planning to compression check your set up?[/QUOTE]
For my set up probably after every track day
=DUsual Z31 suspect: Garage Queen (aka broken)

