-
We have discussed the issue of rack movement some time ago.
There was even a video of rack movement with OEM rubber bushings.
For those that missed it. Here are the installation instructions.
The steering rack bushings have been made from
custom molded PMC-790 urethane rubber with these
specifications; 90 Shore A hardness, 300 pli (pounds per
linear inch) tear strength and 600% elongation at break.
At the time of manufacturing a coating of silicon spray
mold release (friction reduction lubricant) is transferred
to the product. In addition, the mold surfaces are highly
polished.
This molding process produces a very glossy surface
with a micro bonded silicon surface lubricant. This
attribute is a plus for reducing unwanted sounds
sometimes produced by polyurethane parts when part
of a dynamic suspension system. The steering rack (SR)
housing assembly is not designed to move once installed.
The rubber bushings are present to reduce road surface
vibration felt by the drive through the steering wheel.
What you need to do before installing them:
You will need to physically clean and remove any residual
mold release compound from all contact
surfaces of the bushings. During this
cleaning process the SRB mating
surfaces will become scuffed
which promotes friction and
reduce the possibility of
unwanted movement of the SR housing
within the hold down clamps
3 Steps: In your set of SRB you will find an abrasive
pad. This pad, acetone and clean rags are the cleaning
tools required.
• Clean each of the bushing with a clean rag dipped in
acetone. Rotate the rag to a new area for each of the
bushing’s mounting surfaces. Once completed, repeat
the process.
• Using the supplied abrasive pad wetted with acetone,
scrub the inside/outside surfaces of the two ‘C’ clam shell
shaped parts and the same for the ‘split-O’ donut bushing.
• Lastly, clean the SR housing mounting surface and hold
down clamps as prescribed above.
A NOTE about the use of acetone. Read the
WARNINGS on the acetone container. Use only in an
open well ventilated area. Acetone is extremely
flammable with a flash point of -4 °F.
Visually inspect each of the surfaces to confirm that they
are de-glossed and lightly abraded.
Micro abraded mating surface, free of lubricants, oils,
grease and lose debris form a tighter bond through
increased surfaces adhesion.
At this point the bushings can be installed.
RECOMENDED
HOWEVER, for additional adhesion:
To prevent any movement at all; prior to
assembly, apply a liberal coating of a
moisture cure polyurethane adhesive to
all mating surfaces. 3M Windo-Weld and
Sikaflex 1A are this type of adhesive.
Remove any residual or excess adhesive with mineral
spirits. Other aggressive solvents may damage painted
surfaces or affect the curing of the adhesive. -
I've got a writeup coming soon on how to remedy this situation. Will cost less than $25 and take a little bit of fab time. Really simple elegant solution to this, surprised somebody hadn't done it already.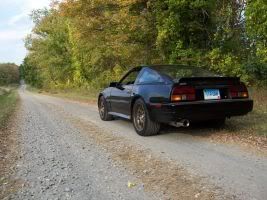
-
When.Gregmatic;324699 wrote: I've got a writeup coming soon on how to remedy this situation. Will cost less than $25 and take a little bit of fab time. Really simple elegant solution to this, surprised somebody hadn't done it already.Cha iro
enjoy building it yourself.
if it fails, fuck it.
at least you gave it a whirl. -
What he said. I need to do something about mine.Augustus Maximus;331835 wrote: When.Prius… because Pretentious wouldn't fit across the back of the car…
Cheap, Fast, Reliable - pick any two
My 1986 Turbo Build -
soooooooooooooon -
-
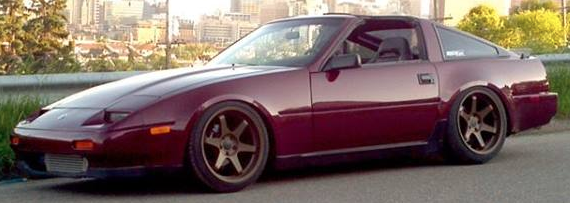

1988 300zxt. gt35, stance, etc. Wheels: Varrstoen ES2 18x9.5 et-13 225/40. 18x10.5 et0 245/40
1990 jetta vr6'd -
Yeah…soon.Cha iro
enjoy building it yourself.
if it fails, fuck it.
at least you gave it a whirl. -
He doesn't have the $25 obviously… -

-
Gary your image doesn't work for me.
1988 300zxt. gt35, stance, etc. Wheels: Varrstoen ES2 18x9.5 et-13 225/40. 18x10.5 et0 245/40
1990 jetta vr6'd -
Zoey - 1987 Z31T GLL - HKS EVC / CM SS 3" turbo-back / Stance GR+
Black Betty - 2014 Audi C7 S6 APR1 -
Weird man, still doesn't pop up for me on the forum, but if I copy the url it works. oh well!
1988 300zxt. gt35, stance, etc. Wheels: Varrstoen ES2 18x9.5 et-13 225/40. 18x10.5 et0 245/40
1990 jetta vr6'd -
So what ever happened to this?Gregmatic;324699 wrote: I've got a writeup coming soon on how to remedy this situation. Will cost less than $25 and take a little bit of fab time. Really simple elegant solution to this, surprised somebody hadn't done it already.Prius… because Pretentious wouldn't fit across the back of the car…
Cheap, Fast, Reliable - pick any two
My 1986 Turbo Build -
I have some S13/14/Z32 busings siting on my shelf, although not 100% fit on the round one, its better than none/busted crap. it's what I have on the M30…Damn dirty angels....these cars!
Current Daily Driver - 86 Turbo.
Under the cover - THE BANANA… that needs to be re-energized.
sigpic


Copyright © 2006–. All rights reserved. Privacy Policy